Making a printer and scanner server
- Details
- Category: In Progress
- Published on Sunday, 13 May 2012 19:34
Making a printer and scanner server
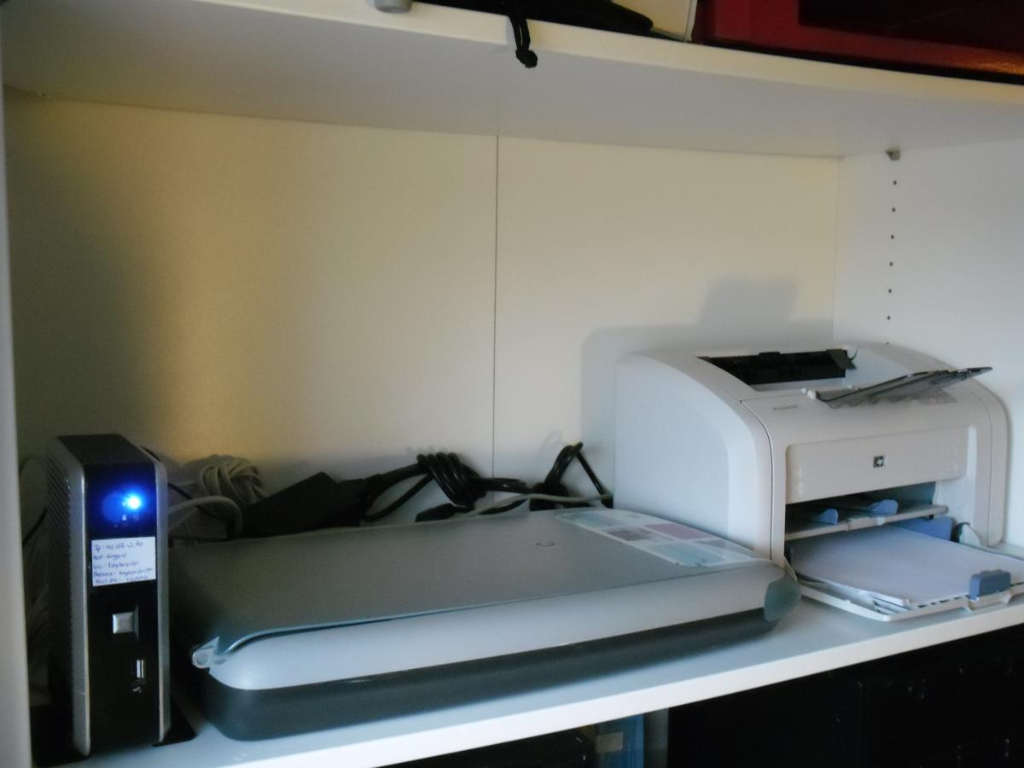 Shared scanner and printer setup Shared scanner and printer setup |
Setting up a small print-and-scanner server is fairly straight forward if you know your linux, but might give you a few problems otherwise. I have for some time wanted to be able to both print and scan from different computers and therefore wanted to build a server capable of handeling both.
I have a small USB HP Laserjet 1018 which has served me well. I bought it as i have newer experienced problems with any HP laserjets. Usually it's just plug and play in linux. This model is, however, a bit tough. It requires you to upload its firmware to it whenever it has been without power or is plugged in.
There are some opensource scripts (HP-LIB) that can do this for you, but it means that the normal embedded printservers cannot be used, hence you have to use a dedicated computer (or reconfigure the embedded server).
As I had also wanted to share my scanner between computers a small lowpower computer was ideal for sharing both.
Gadgets:
- A small lowpower 800 Mhz i386 compatible lunchbox-sized computer with 256 mb ram. It used to have an 20gb harddisk, but as that got fried in an experiment i have installed a small 4gb compact flashcard with an adapter instead.
- HP LaserJet 1018 with USB connection
- HP ScanJet 3530c Lowend but fairly stable scanner. Scans fine from command prompt but has some problems with the graphical interface xsane normally used.
Installing Debian 6.05 (Debian squeeze):
Surprisingly difficult. ... That is, installation of the Debian net install was a breeze, but getting the freaking external cd drive to work was 3 hour pain. I Performed a basic installation from the net version of Debian (smallest version). Made a 3.4gb partition for the system and a 256mb swap partition. Plenty of room for all.
Add your main user to sudoers
In order for you not to make mistakes and running as root all the times, add your main user to sudoers
switch to root with the command su
type visudo and add your user to the list at the bottom like this
your_username ALL=(ALL) ALLAfter this you have sudoers access.
Setting a static IP
As both network printing and scanning will be done over the interfaces we will set a static IP for our server. I have chosen the address 192.168.3.70. Chose whatever suits you. Most networks have an 192.168.0.X range, though
First backup your interface file so you do not make mistakes.sudo cp /etc/network/interfaces /etc/network/interfaces.bak
Then edit the interface settings
sudo vi /etc/networking/interfacesMake the entries look like this:
# The first network card - this entry was created during the Debian installation# (network, broadcast and gateway are optional)
auto eth0iface eth0 inet static
#set your static IP below
address 192.168.3.70 #set your default gateway IP here
gateway 192.168.3.1 netmask 255.255.255.0
network 192.168.3.0
broadcast 192.168.3.255
Save and restart your server.
Installing the printer basics
In order to install get the printer working, we need to get cups, related tools and databasefiles working.
Also, we need foo2zjs printerdriver/utillities to get the troublesome printer going. Actually you could use some propritary HP stuff instead, but I have had serious trouble getting it to work, so we will use the foo2zjs.
Install the tools you need by writing:
apt-get install foomatic-db foo2zjs cups cups-pdf psutils foomatic-db-hpijs foomatic-db-gutenprintConfiguring the foo2zjs printerdriver
The foo2zjs printerdriver can be used with many printers. We need a specific file identifying the printer we will use.
Tutorials states that we could use the command (part of the foo2zjs suite) getweb 1018 to obtain it. I haven't however been able to get this to work.
Fortunately the command just gets and unzips/unarchives a specific file, and we can equally well do this ourself.
tar xzvf sihp1018.tar.gz
Afterwards we need to convert file to a specific imagefile that can be loaded by the printerdriver into the printer (it creates a bytestream that we need to redirect to a file):
sudo arm2hpdl sihp1018.img > /usr/share/foo2zjs/firmware/sihp1018.dl- and the printerdriver along with firmware is in place.
Installing graphical enviroment
In order to get the printer and sharing working we need to configure the CUPS printing enviroment. This is done through a webenviroment. Though this can be accesses through the textbased webbrowser Lynx, you are required to login as root on the webpage. Login sessions are somewhat difficult with lynx so instead we will install a minimal graphical enviroment and a small web browser
For the sake of being efficient on this small machine, we will use fluxbox as xserver. Midori will be used as web browser as it has a resonably small footprint and will be sufficient for our purposes. (in fact, I would have liked to use the dillo web browser as it is even lighter, but it is not in the debian repositories anymore and I wanted to stick with those)
apt-get install xorgapt-get install fluxboxapt-get install midoristartxConfiguring the printer and connecting from linux and windows
This is quite simple. Simply fire up dillo and navigate to localhost:631 - Go to "Add Printer" and use root credentials when asked. You can now add a printer based on the driver you installed earlier. The process is selfexplanatory. Remember to use the gui to mark the printer as shared - and print a testpage. Also set the defauls correctly. For some reason the normal default is to use "letter" format.
After doing this, you should be able to find and install the printer from other linux/apple machines. Many people also try to share the printer with windows machines using SAMBA (as did I). This approach is extremely difficult to get to work as the hp driver for this specific printer is embedded in an installation enviroment that requires you to fysically plug the usb plug into the computer in order to get the printer ...and even after that you wont get the drivers generally available to windows. I spend a few hours on it and failed misserably. It is appearently because the evil HP do not want people sharing their entry level printers for some reason.
There is, however, a workaround. See, since win 2000 and forth, windows has supported the printing protecol IPP which is actually way more reliable than SAMBA printing. It is http based and extremely easy to set up.
Just choose to add a network printer in windows and type in the address:
http://192.168.3.70:631/printers/Your_printer_nameWhen asked for a driver, remember that we installed a postscript utillities package, along with cups therefore can recieve postscript (letting us circumvent the nasty HP-USB-Driver. - Just choose any postscript driver available. For instance, "HP Color LaserJet 2800 PS" build into Windows 7 works just fine.
Now you should be able to print without problems.
Scanner basics
Now that we have got our printer working, we will install the scanner. Most scanner programs for linux uses the SANE (http://www.sane-project.org/) scanner backend. It is essentially a commandline program that you can call locally or remotely.
As I wanted multiple computers and tablets with different OS to be able to utilize the scanner I opted for a web-based frontend for SANE.
Installing SANE
First install the needed software:
Now detect that sane can find your printer using the command scanimage -L you should get an output that looks like this:
device `hp3500:libusb:002:002' is a Hewlett-Packard ScanJet 3500 scannerThis means that the printer is working, that it is detected as an HP3500 scanner and is connected through the library libusb. It is using the second usbbus (the first 002) and is eumerated as device 002 (the second 002)
Now, there are some pretty nasty security problems regarding usb scanners connected through libusb, so we cannot assume that it will work out of the box for all users. The root user will not have any permission problems, so switch to the root account and try
scanimage | pnmtojpeg > /tmp/somthing.jpegAssuming everything works, scanimage will have captured a pnm image from the scanner, piped it to pnmtojpeg that directed its output to /tmp and made a jpeg file for you.
Installing lighttpd webserver along with php
As we want to scan from using a webfrontend, we will be using phpSANE which is a simple webpage that lets people click around and set settings, before it parses these settings into arguments that it feeds to sane.
switch to root account and type:
apt-get install lighttpd php5-cgiThis installs lighttpd and php5.
Open up x and start webbrowser and test that the webserver works. In the addressfield you can just write localhost. There is a placeholder site that will tell you that the werver works.
Lighttpd's default document root is /var/www on Debian, and the configuration file is /etc/lighttpd/lighttpd.conf.
To enable PHP5 in Lighttpd, we must modify two files, /etc/php5/cgi/php.ini and /etc/lighttpd/lighttpd.conf. First open /etc/php5/cgi/php.ini and add the following at the end of the file:
line cgi.fix_pathinfo = 1Then open /etc/lighttpd/lighttpd.conf and add "mod_fastcgi", to the server.modules section:
Finaly, add the following at the end of the file:
fastcgi.server = ( ".php" => (("bin-path" => "/usr/bin/php5-cgi",
"socket" => "/tmp/php.socket"
)))
When this is done, create a file: /var/www/info.php with the following content:
<?phpphpinfo();
?>
after this, reboot the computer to restart the webserver. You should now be able to see that php5 works by going to http://localhost/info.php where the php info is located.
Installing phpSANE
php sane is very easy to install. At the time of writing, the version 0.6.1 was the latest and could be downloaded from HERE
Just unpack it and place the phpsane directory into /var/www
It can then be accessed from http://localhost/phpSANE/phpsane.php
Dealing with permission issues with phpSANE, libusb and SANE.
 Detecting Errors in phpSANE Detecting Errors in phpSANE |
As previously mentioned there are some permissionproblems when trying to access scanners with any user other than root. Luckily phpSANE will write the last command it fired to scanimage if it got an error back. This can be used for errorchecking. .. for instance you could try the command as root to check.
Assuming you can use scanimage as root without problems, do the following to enable other users to scan.
First, switch to root and check connected usb devices with command lsusb you will get an output that looks like this:
#Bus 002 Device 003: ID 046d:c016 Logitech, Inc. Optical Wheel Mouse
#Bus 002 Device 002: ID 03f0:2005 Hewlett-Packard ScanJet 3570c
#Bus 001 Device 001: ID 1d6b:0001 Linux Foundation 1.1 root hub
#Bus 001 Device 001: ID 1d6b:0001 Linux Foundation 2.0 root hub
In our example we see scanner - 'Bus 001 Device 006: ID 03f0:2005 Hewlett-Packard ScanJet 3530C. The important thing is to note that it has the id (vendorid:productid) 03f0:2005
Now we will change the udev rules to give us permissions to utilize the usb. Udev is the device manager, and we can set up some dynamic rules that will let us do this.
As root edit the file vi /lib/udev/rules.d/53-sane.rules and look for the first part of the ID number found previously and check if there is a line that also reports the second part of the number (model numer), in this this example 2005. If not found change or copy a line and enter the idVendor and idProduct of your scanner, in this example it would be:
# Hewlett-Packard ScanJet 3530CATTRS{idVendor}=="03f0", ATTRS{idProduct}=="2005", MODE="0664", GROUP="scanner",
ENV{libsane_matched}="yes"
Save the file, plug out and back in your scanner and the file permissions should be now correct.
The last thing to do is to add the users running lighttpd (and therefore php and scanimage through fast-cgi) to the scanner and lp group to give permissions to scan.
gpasswd -a lighttpd scanner;gpasswd -a lighttpd lp; gpasswd -a www-data scanner; gpasswd -a www-data lpOther users that need to scan can be given permissions in the same fashion.
modifying phpSANE so it will work
 Before micropatch Before micropatch |
 After micropatch After micropatch |
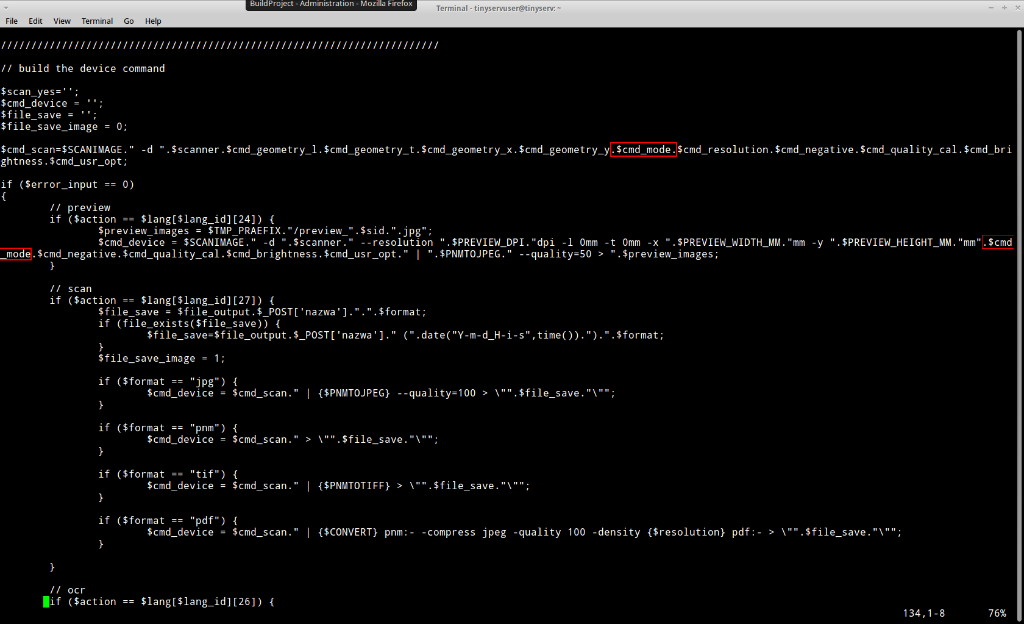
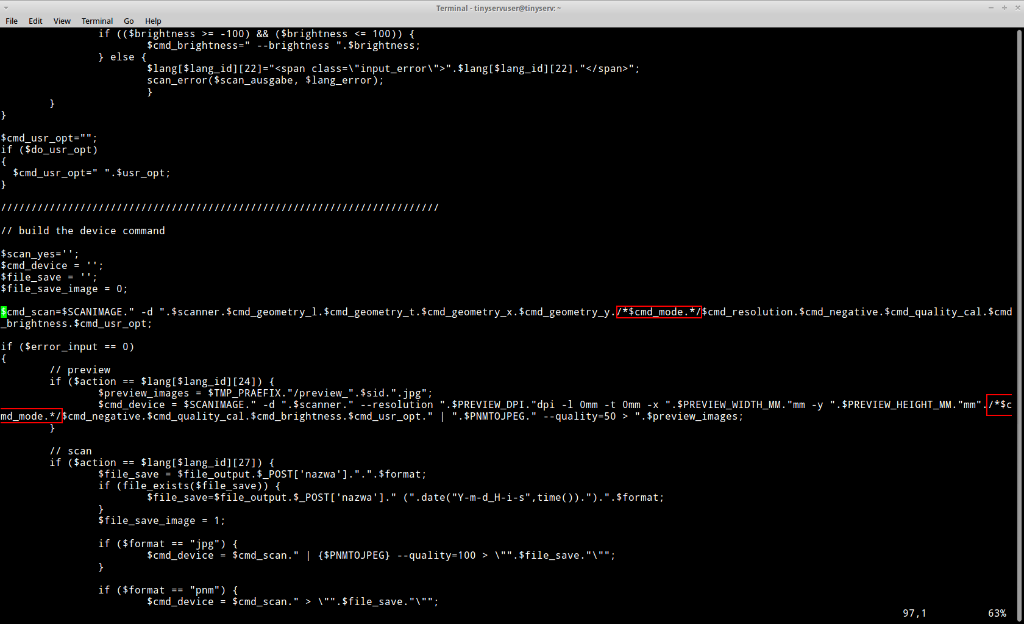
Unfortunately there is a bug in phpSANE - or rather, it is somewhat outdated. it sends a parameter to the scanner that is invalid (supposedly it was valid once, but SANE got upgraded) We will therefore comment it out to make sane work.
Change to root and open the file /var/www/phpSANE/scan.php
in line 97 and 104, comment out the $cmd_mode argument using the syntaxt: /*$cmd_mode.*/
The two lines will then look like this:
Line 97: $cmd_scan=$SCANIMAGE." -d ".$scanner.$cmd_geometry_l.$cmd_geometry_t.$cmd_geometry_x.$cmd_geometry_y./*$cmd_mode.*/$cmd_resolution.$cmd_negative.$cmd_quality_cal.$cmd_brightness.$cmd_usr_opt;and
Line 104: $cmd_device = $SCANIMAGE." -d ".$scanner." --resolution ".$PREVIEW_DPI."dpi -l 0mm -t 0mm -x ".$PREVIEW_WIDTH_MM."mm -y ".$PREVIEW_HEIGHT_MM."mm"./*$cmd_mode.*/$cmd_negative.$cmd_quality_cal.$cmd_brightness.$cmd_usr_opt." | ".$PNMTOJPEG." --quality=50 > ".$preview_images;You should now be able to scan your images. As you have commented out the mode attribute, you will only be able to scan in color, but that should easily be corrected in any graphics editor.
... In fact the PHP script is quite simple. You should have no problems correcting it and altering it so you can get other modes... But at the present, I simply cannot be bothered.
Finally
You should now have a nice simple printer and scanner server. I use mine frequently, and is glad i made it. Also learned a bunch in the process.